Friday, April 29, 2011

Jersey Baby


Some companies' packaging is as pretty as their products. I love to use the packaging from Jillibean, Prima and Girl's Paperie to name a few. These flower packages from the corrugated butterflies and pins make perfect frames for my beautiful niece's photos. Jersey's beautiful eyes make her photo jump. I also removed the hang tag, trimmed it and used it as a pull tab for hidden journaling.

Monday, April 25, 2011

Mojo Monday!

It's Mojo Monday and my latest edition of storytelling has gotten the better of me!  Especially, when CUTIE PIE stuff like this comes into stock


It may be April, but Echo Park is definately getting a jump on Summer with this ADORABLE paper line.  They have also added the CUTEST embellishments to go with it. 


Stayed tuned...I'll be making another post on Thursday!  Okay, now to update the website.

{{Hugs}},
Mimi

Saturday, April 23, 2011

just a little masking layout


Just wanted to show you a little homemade masking that I did.

Friday, April 15, 2011

I made cards!!!

I know , I know , now dont be shocked.. but when I got these awesome Unity stamps from Mimi,, I just had to play with them , and these are some of what I made.


The Chandelier is from the stamp set titled "breathless" and it just called for some BLING and lots of it! I used rhinstones and "dew drops" to bling it out, and it really turned out cute!
The "I live for you" also come from "breathless" and it is heat embossed with flat black embossign powder, and really makes a statement all by itself!
The butterfly come from the stamp set "art & soul" and is soo awesome , she is heat embossed with irredescent blue glitter, and cut out then colored with red copic, and lifted with a pop dot.I also used the "create" and the flourish from the same set.Also on this card, I used the "modern homemaker" papers by october afternoon.
I hope you enjoy my newfound abilities at card makeing, as much as I did.
thanks for looking,
Kristie

Thursday, April 14, 2011

"Let them eat CAKE!"

Today's post is a bit out of the ordinary...I have been taking the Wilton's Decorating Basics class and this week we had to bake a cake.  This was my first time baking a cake the PROPER way and HOORAY, it turned out.  Now our other part of our assignment was to use piping gel to transfer an image to our cake
                                                         <em>Wilton</em> W105 <em>Piping Gel</em>

My first instinct was to find a coloring page, but then it hit me.  Why not use a stamp?  So here's what I did.  I found a C U T E stamp from UNITY
                                                        Picture of Big Polka Dot Cupcake

Stamped the image on a piece of Bazzill Smoothie cardstock.  Then use the piping gel to trace the image.  Apply the image to your cake.

Then finish the cake with whatever colored frosting you like.  Here's how my first cake turned out.  Can't wait for dessert tonight!


{{Hugs}}
Mimi

Wednesday, April 13, 2011

Summer Time


Story's can be told in several different formats: verbally, written, and visually through photographs or other artwork and these are just to name a few. I prefer to tell my stories either verbally or visually. I think that is one of the reasons I love scrapbooking. However, journaling is an important part of scrapbooking and writing or journaling is not my forte. The layout above is a prime example of how my scrapbooking process goes, I work on the layout, add photos, leave a spot to journal and then I put it aside to journal "later." I have a place for journaling with no words in the journaling box. Why? I ask myself, do I do this? Am I scared to actually complete something? Or it is pure laziness? Or is it that I just don't think I need to do it?

I have tried several different techniques to get my journaling done. When I first started scrapbooking I typed everything. I thought this was a great solution with all the cool fonts and spell check! Then I went to writing everything in a journal first and then writing it on my layouts (when I had time). Now my pages just look like the above layout.

My goal this month is to work on my journaling techniques so I am not constantly worrying or not completing my pages. If you have suggestions on how to journal more effectively I would enjoy hearing them.

I was in a Technique Tuesday class recently that suggested that you use a different color pen (other than black) for your journaling. Most of us don't like our handwriting so using a different color ink - something not so bold - helps soften it up. I have tried this time and again and I enjoy it, but I still haven't found a technique or system I am in love with.

Be sure to share about your journaling techniques and the way you tell your story in writing.

Tuesday, April 12, 2011

Jillibean Soup Spotted Owl - Typical Night Out On The Town


Spotted Owl has more of a birthday feel to it, but I wanted to show you that it can be used on non-birthday projects as well. This layout I made documenting two of the favorite things my kids like to do with their Grandma and Grandpa Hansen. They are the only two grandchildren and spoiled rotten. A trip to Walmart to buy a toy and a meal at Burger King or McDonalds occurs about 95% percent of the time.


On this layout I also used the flower shaped packaging from the some of Jillibean's corrugated cardboard shapes and then layered Jillibean Soup Spotted Owl stickers and die cuts and added alphabet stickers to spell out my title. The paper I used was actually from the 6x6 Jillibean paper pad - so see you don't always need a 12x12 piece of paper to make a layout! I ran Bazzill cardstock thru my Cuttlebug to give it some dimension. Because the embossing plate only covers about a 4x6 area, I hid the seam under the photo. For the title I used Jillibean Soup Glazed Green Alpha Beans and the mini ABC stickers are from Jenni Bowlin.


And I also want to say I even journaled on this one!

Friday, April 8, 2011

October Afternoon,(modern homemaker)

I just adore this paper line! it is called Modern homemaker by October afternoon.
At first I had a hard time working with it, but the photos I was trying to use just werent working,, so I found this photo of my mom taken in 1964. And it goes perfectly!!
The colors are perfect for a 1960s era photo.The teal,yellow and red with just a touch of pink,, lovely, dont cha think?

Thursday, April 7, 2011

Technique Thursday!

Hi Everyone!  We have had some changes to our blog members so I'm bringing you today's post.  A few weeks ago, I shared with everyone how my friend Dawn inspired me as she is trying to "BUMP" up her scrapbooking pages.  Well today's post is just that.

TODAY, I bring you G E S S O
Claudine Hellmuth Studio Gesso By The Each

I have to admit, Gesso is new to me and my dear friend Heather is more of an expert at Gesso than I, but hey, we're trying new things here right?

ges·so   /ˈdʒɛsoʊ/ Show Spelled


[jes-oh]

–noun, plural -soes.

1. gypsum or plaster of Paris prepared with glue for use as a surface for painting.

2. any plasterlike preparation to prepare a surface for painting, gilding, etc.

3. a prepared surface of plaster or plasterlike material for painting, gilding, etc
 
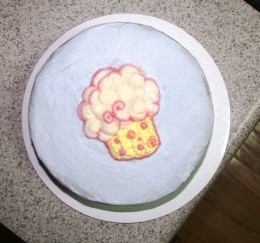
For my layout, I used Gesso as a primer to my 12" x 12" Kraft paper.  I used some household objects (empty toilet paper roll, plastic fork) to create texure in my layer.  Once that dried, I added some pretty colors to enhance  my photo.  Finally for the conclusion, I added my layer of embellishments from Pink Paislee - Hometown Summer, title is a rub on (hard to see in pic), items to make it pop more.  And here you go, my out of the box, BUMPing it UP scrapbook page. 


{{Hugs}}
Mimi
 

Monday, April 4, 2011

Mojo Monday #14 {The Art of Story Telling}

Mojo Monday kicks off a new theme for this month.  The month of April is embracing something that proves to be a big challenge for a lot of us: Storytelling.  I hate to admit, but I am TERRIBLE when it comes to Journaling and Storytelling.  Recently, I looked back through some of my scrapbooks and I really have done a disservice.  Yes, I {CAPTURED} the moment, H I L I T E D the page, and I even Documented the EVENT.  But looking back years later...I didn't TELL the STORY.

This week I am challenging you to tell your story through your PHOTOGRAPHS.  Here's a few tips to consider when taking pictures.

1. A good story starts with an INTRODUCTION.  In Photography, this is your CAPTURE photo or your main photo that is going to TELL the story.  These shots introduce the characters or sets up the scene for the story.  The below picture is my husband and I .  Guess the event {OUR WEDDING}

2.  The Next part of a story or Your next photos {Multiple Photos on Layout} is the P L O T.  These photos are the supporting information to the story.  They enhance and SUPPORT the main photo or Introduction. So when you are taking photos, have a plan, what shots are you going to capture to help tell the story.


3.  Lastly, every STORY has a CONCLUSION or ENDING.  What is the closing shot that ends your story?  This photograph brings closure to your story.  Now I obviously wasn't the photographer, but this shot could have even been zoomed out further so that we were more out of focus or farther out of distance.  Another possible ending to this story could have been us walking away holding hands or traditionally, driving away in the horse drawn carriage.  Kidding...we didn't have a horse drawn carriage, but you get the point.


Have fun telling YOUR story.  Be mindful of the pictures you take and those you use.  Scrapbooking is an incredible craft.  Next week, I will focus on tips for JOURNALING your STORY.

{{Hugs}}
Mimi

Sunday, April 3, 2011

Yay for Jillibean soup!

They never cease to amaze me at the lovely paper that they make, and spotted owl soup is no exception!!
It is so fresh and bright and fun! I made a page with it, and have several more ideas, (for showing you later:))
Anyways,, I made this one with a photo of my Little guy. and used some journal spots for accents.